Jellycat Birthday Cake with Chocolate Drip
Highlighted under: Simple Sweet Recipes
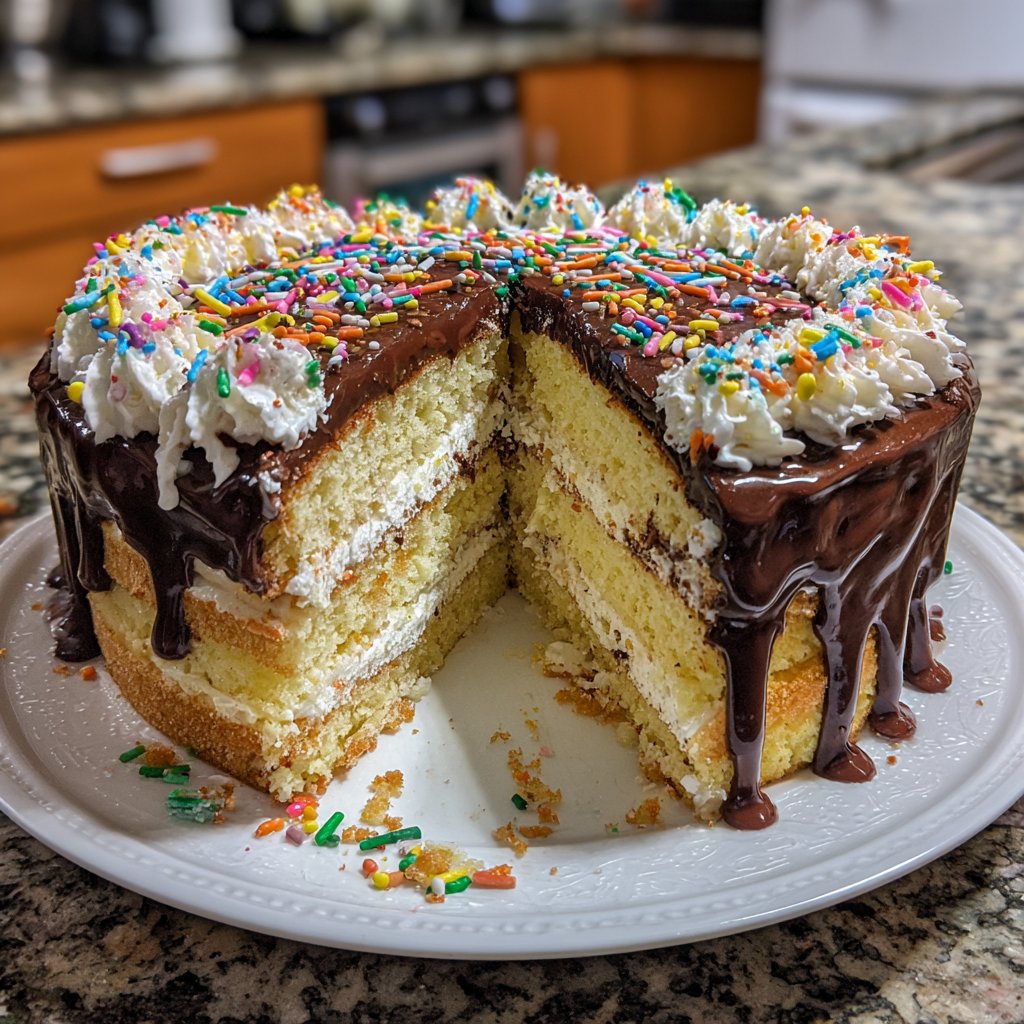
I can't express how excited I am to share this Jellycat Birthday Cake with Chocolate Drip recipe! Celebrating special occasions has always been a delight for me, especially when this cake is involved. The soft and fluffy layers combined with a luscious chocolate drip create a stunning centerpiece for any birthday party. Each bite is a harmonious blend of flavors, and it brings a smile to both kids and adults alike. I promise this cake will be a hit, making your celebration even sweeter and more memorable!
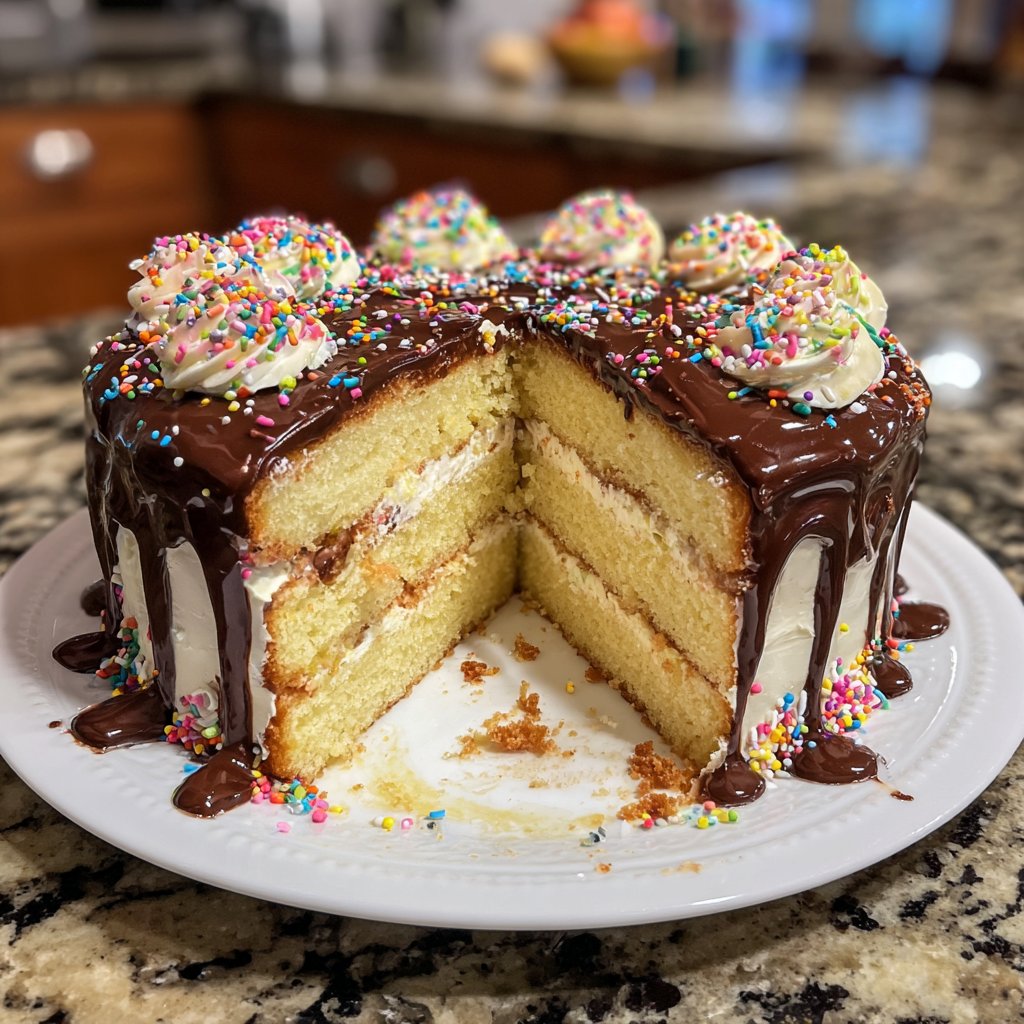
Making this Jellycat Birthday Cake with Chocolate Drip was a joy from start to finish! I meticulously crafted each layer, ensuring the cake was moist and light, which sets it apart from typical birthday cakes. The lightness allows it to complement the rich chocolate drip rather than overwhelm it. For the drip, I used high-quality dark chocolate mixed with cream to achieve that perfect glossy finish.
One of my favorite tips is to let the cake cool completely before applying the chocolate drip. This prevents the chocolate from running off the sides too quickly, ensuring a beautiful presentation. I've experimented with various designs, but this simple drizzle technique always brings out the playful character of the Jellycat theme!
Why You Will Love This Recipe
- The playful design that's perfect for any birthday celebration
- Rich chocolate drip that balances beautifully with the fluffy cake
- Easy to follow, making it fun for bakers of all levels
Tips for the Perfect Cake Layers
For the softest cake layers, it's essential to accurately measure your flour by spooning it into the measuring cup and leveling it off with a knife. This prevents your cake from becoming dense and ensures a light texture. Additionally, be careful not to overmix the batter. Mixing until just combined prevents excessive gluten formation, which can lead to a tough cake.
Another critical step is to ensure your eggs and milk are at room temperature before incorporating them into the batter. This helps the ingredients blend more evenly, resulting in a consistent batter that bakes uniformly. If you're pressed for time, you can warm the eggs in a bowl of hot water for about 10 minutes to bring them up to temperature quickly.
Understanding the Chocolate Drip
The chocolate drip is not just visually appealing; it adds a rich chocolate flavor that complements the cake beautifully. Using high-quality dark chocolate chips will significantly enhance the taste of your drip. When melting the chocolate with heavy cream, make sure to heat the cream gently and avoid boiling, as this can cause the chocolate to seize up. Stirring until the mixture is glossy ensures a seamless pour over your cake.
If you find the chocolate too thick or it doesn't flow easily, simply add a touch more warm cream or a bit of vegetable oil to achieve your desired consistency. This way, you can control the thickness of the drip and prevent it from overwhelming the delicate cake layers below.
Ingredients
Cake Ingredients
- 2 cups all-purpose flour
- 1 ½ cups sugar
- ½ cup unsweetened cocoa powder
- 1 ½ tsp baking powder
- 1 ½ tsp baking soda
- 1 tsp salt
- 2 large eggs
- 1 cup milk
- ½ cup vegetable oil
- 2 tsp vanilla extract
- 1 cup boiling water
Chocolate Drip Ingredients
- 1 cup dark chocolate chips
- ½ cup heavy cream
Decoration
- Whipped cream (for topping)
- Sprinkles
- Jellycat-themed cake topper
Instructions
Prepare the Cake Batter
In a large bowl, mix the flour, sugar, cocoa powder, baking powder, baking soda, and salt. In another bowl, combine the eggs, milk, vegetable oil, and vanilla extract. Gradually add the wet ingredients to the dry ingredients and mix until just combined. Finally, stir in the boiling water until the batter is smooth.
Bake the Cake
Preheat your oven to 350°F (175°C). Pour the batter evenly into two greased and floured round cake pans. Bake for 30-35 minutes or until a toothpick comes out clean. Allow the cakes to cool completely on a wire rack before removing from the pans.
Make the Chocolate Drip
In a microwave-safe bowl, heat the heavy cream until it begins to simmer. Remove from heat and add the chocolate chips. Stir until the chocolate is melted and smooth.
Assemble the Cake
Once the cakes are completely cooled, place one layer on a serving plate. Spread a layer of whipped cream on top, then place the second layer on top. Pour the chocolate drip around the edges, allowing it to drip down the sides. Pour the remaining chocolate in the center.
Decorate and Serve
Top the cake with more whipped cream, colorful sprinkles, and your Jellycat-themed topper. Slice and enjoy at your birthday celebration!
Pro Tips
- Always ensure your ingredients are at room temperature for the best results. You can refrigerate the cake to set the chocolate drip better before serving.
Storage and Make-Ahead Options
This Jellycat Birthday Cake can be made ahead of time, making it perfect for busy celebrations. You can bake the layers up to two days in advance; just make sure to wrap them tightly in plastic wrap after they’ve cooled. Keep them stored in the refrigerator to maintain their freshness. When ready to serve, assemble the cake and pour on the chocolate drip.
If you have leftover cake, store it in an airtight container in the refrigerator for up to five days. The cake flavors will continue to meld together, often making the cake even tastier with each passing day. You can also freeze the unassembled cake layers for up to a month, just be sure to let them thaw completely before adding the frosting and drip.
Serving Suggestions
To elevate your celebration, consider serving this cake with a scoop of vanilla ice cream or a dollop of whipped cream alongside each slice. The creamy texture pairs wonderfully with the rich chocolate drip and fluffy cake, creating a delightful contrast. Additionally, fresh berries can add a burst of flavor and a pop of color to the plate, enhancing the overall presentation.
If you're looking to customize the flavor profile, try adding flavored extracts like almond or mint to the cake batter for an exciting twist. Alternatively, layer slices of fruit such as bananas or strawberries between the cake layers for a fresh and fruity surprise that complements the rich chocolate perfectly.
Questions About Recipes
→ Can I make this cake in advance?
Yes, you can bake the cake layers a day ahead and store them in the refrigerator. Just assemble and decorate on the day of serving.
→ What can I use instead of dark chocolate?
You can use semi-sweet chocolate if you prefer a sweeter drip.
→ Can I freeze this cake?
Absolutely! Freeze the cake layers without the frosting or chocolate drip. Just wrap them tightly in plastic wrap.
→ How do I fix a runny chocolate drip?
If your chocolate drip is too runny, try chilling it in the refrigerator for a few minutes to thicken it up before using.
Jellycat Birthday Cake with Chocolate Drip
Created by: The Foodspherehub Team
Recipe Type: Simple Sweet Recipes
Skill Level: Intermediate
Final Quantity: 12.0
What You'll Need
Cake Ingredients
- 2 cups all-purpose flour
- 1 ½ cups sugar
- ½ cup unsweetened cocoa powder
- 1 ½ tsp baking powder
- 1 ½ tsp baking soda
- 1 tsp salt
- 2 large eggs
- 1 cup milk
- ½ cup vegetable oil
- 2 tsp vanilla extract
- 1 cup boiling water
Chocolate Drip Ingredients
- 1 cup dark chocolate chips
- ½ cup heavy cream
Decoration
- Whipped cream (for topping)
- Sprinkles
- Jellycat-themed cake topper
How-To Steps
In a large bowl, mix the flour, sugar, cocoa powder, baking powder, baking soda, and salt. In another bowl, combine the eggs, milk, vegetable oil, and vanilla extract. Gradually add the wet ingredients to the dry ingredients and mix until just combined. Finally, stir in the boiling water until the batter is smooth.
Preheat your oven to 350°F (175°C). Pour the batter evenly into two greased and floured round cake pans. Bake for 30-35 minutes or until a toothpick comes out clean. Allow the cakes to cool completely on a wire rack before removing from the pans.
In a microwave-safe bowl, heat the heavy cream until it begins to simmer. Remove from heat and add the chocolate chips. Stir until the chocolate is melted and smooth.
Once the cakes are completely cooled, place one layer on a serving plate. Spread a layer of whipped cream on top, then place the second layer on top. Pour the chocolate drip around the edges, allowing it to drip down the sides. Pour the remaining chocolate in the center.
Top the cake with more whipped cream, colorful sprinkles, and your Jellycat-themed topper. Slice and enjoy at your birthday celebration!
Extra Tips
- Always ensure your ingredients are at room temperature for the best results. You can refrigerate the cake to set the chocolate drip better before serving.
Nutritional Breakdown (Per Serving)
- Calories: 450 kcal
- Total Fat: 24g
- Saturated Fat: 14g
- Cholesterol: 120mg
- Sodium: 180mg
- Total Carbohydrates: 51g
- Dietary Fiber: 3g
- Sugars: 30g
- Protein: 5g