Chocolate-Covered Strawberry Wands
Highlighted under: Simple Sweet Recipes
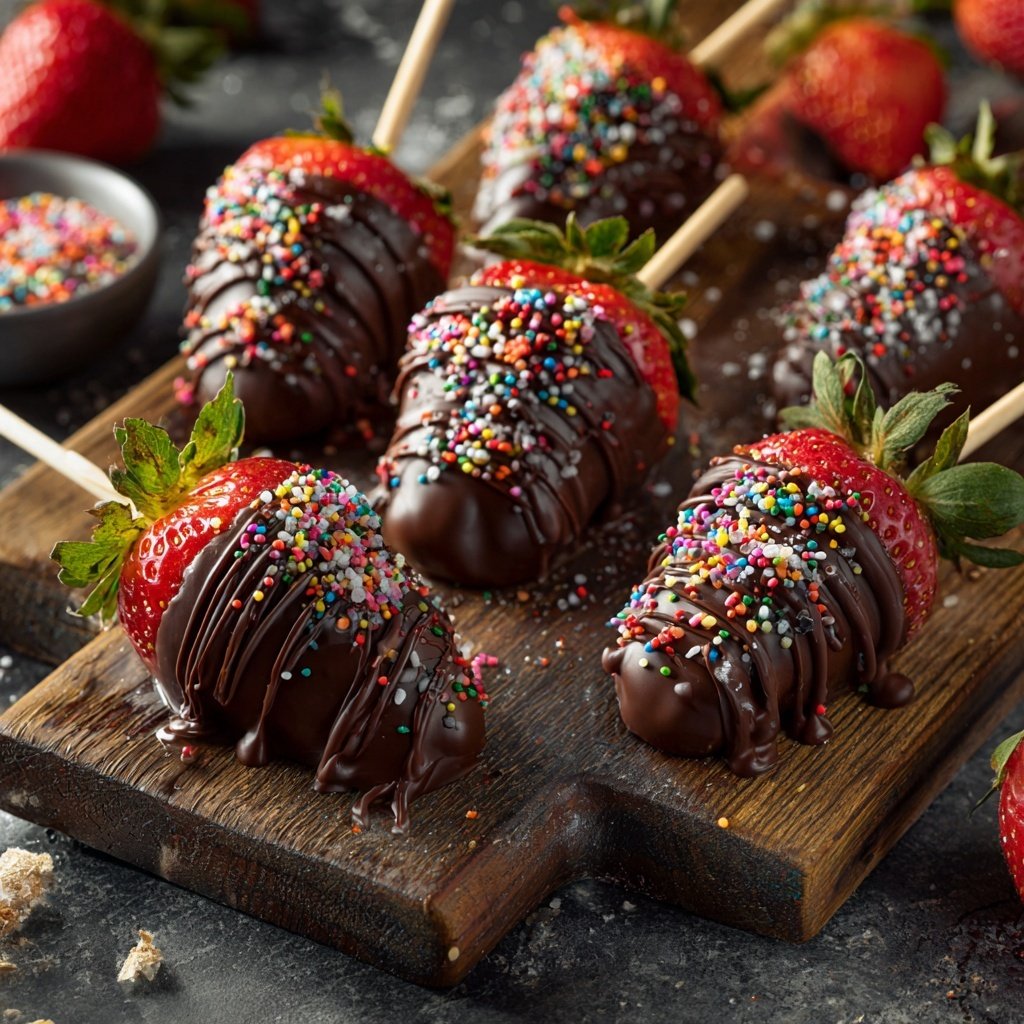
I love making Chocolate-Covered Strawberry Wands as they’re the perfect combination of indulgence and fun! These delightful treats bring back sweet memories of summer picnics and family gatherings. The best part is how easy they are to prepare. Just dip fresh strawberries into melted chocolate and let them set. It's a simple and quick process that packs a big flavor punch, making these wands an irresistible favorite in our home.
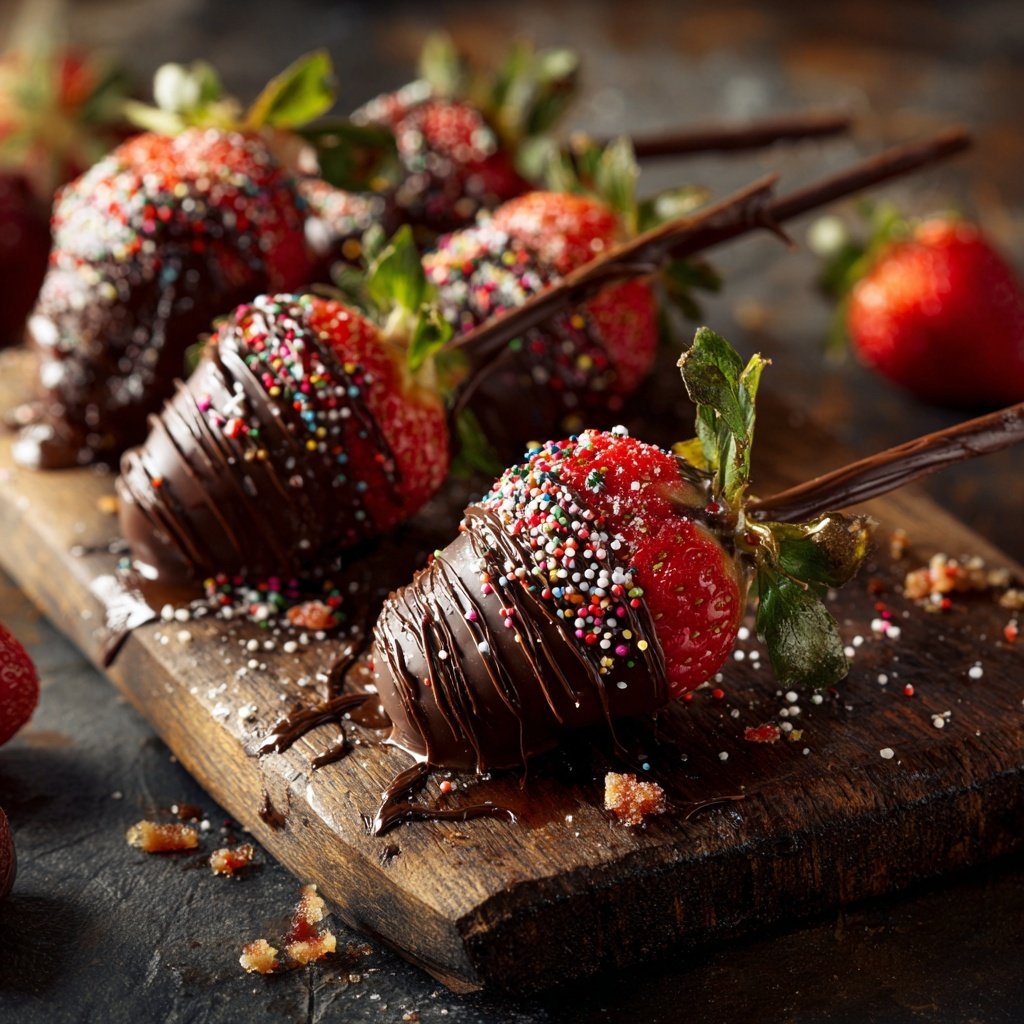
Making Chocolate-Covered Strawberry Wands feels like an art project, and I cherish every moment spent creating these delights. After trying various dipping techniques, I found that placing the strawberries on a stick not only makes them easy to handle, but it also adds a playful touch. Swirling the strawberries in warm chocolate gives them an even, glossy finish that is simply irresistible.
This recipe has become a go-to for birthday parties and casual get-togethers. One tip I discovered is to let the chocolate cool slightly before dipping, as this helps ensure a smooth coating. Whether served on a platter or individually wrapped, these wands never last long!
Why You Will Love These Wands
- Juicy strawberries enveloped in rich, velvety chocolate
- Fun to make and even more fun to eat, perfect for all ages
- Versatile: easily customize with toppings like nuts or sprinkles
Mastering Chocolate Tempering
Tempering chocolate is crucial when aiming for a glossy finish and a satisfying snap. To achieve this, monitor the melting process closely; using a food thermometer, aim for a temperature of around 120°F (49°C) for dark chocolate. After melting, allow the chocolate to cool down to about 90°F (32°C) before dipping the strawberries. This method prevents the chocolate from becoming grainy, ensuring a smooth and shiny coating that enhances the visual appeal of your strawberry wands.
For those who may not have a thermometer, a visual cue is to look for the chocolate becoming thick and partially cooled, yet still pourable. If you accidentally overheat the chocolate, simply add a small amount of un-melted chocolate to bring it back to the proper temperature. My experience tells me that practicing this technique leads to remarkable results, enhancing both the taste and presentation of your chocolate-covered strawberries.
Creative Topping Ideas
While the chocolate coating is delicious on its own, enhancing your strawberry wands with toppings can elevate their flavor and texture. Consider rolling the finished product in crushed pistachios for a nutty crunch or rainbow sprinkles for a festive touch. These toppings not only add extra flavor but also provide a visually appealing contrast against the glossy chocolate. I find that combining textures — like creamy chocolate with crispy nuts — makes each bite more enjoyable.
Don't hesitate to get adventurous with toppings; shredded coconut and crushed pretzels can provide a delightful sweet and salty balance. You can also sprinkle a pinch of sea salt over the chocolate while it’s still wet for a sophisticated flavor twist. When incorporating toppings, be sure to do so before the chocolate hardens completely; this ensures that the toppings adhere properly and do not fall off once set.
Storage and Serving Suggestions
Once your chocolate-covered strawberry wands have set, store them in an airtight container in the refrigerator for up to two days for the best freshness. If you stack them, lay a piece of parchment paper between layers to prevent sticking. However, if you plan on making these ahead of time, consider preparing the strawberries and chocolate separately and dipping them just before serving. This method helps maintain the strawberries’ freshness and prevents them from releasing too much moisture.
Serving these strawberry wands can be an event in itself! Consider arranging them in a decorative jar or glass for a beautiful presentation at parties or special occasions. If you're feeling indulgent, a side of whipped cream or chocolate sauce for dipping provides an extra level of enjoyment. You can also customize the experience by pairing the wands with different fruit options such as bananas or marshmallows for dipping, making it a fun activity for the whole family.
Ingredients
Gather these simple ingredients to create your delicious Chocolate-Covered Strawberry Wands:
Ingredients
- 10 fresh strawberries
- 200g semi-sweet chocolate or dark chocolate
- Optional toppings: crushed nuts, sprinkles, or shredded coconut
Instructions
Follow these simple steps to create your Chocolate-Covered Strawberry Wands:
Prepare the Strawberries
Rinse the strawberries gently under cold water and pat them dry with a paper towel. Ensure they are completely dry, as moisture can cause the chocolate to seize.
Melt the Chocolate
In a microwave-safe bowl, add the chopped chocolate. Melt it in 30-second intervals, stirring in between until smooth. Be careful not to overheat the chocolate.
Dip the Strawberries
Insert a skewer or lollipop stick into the stem end of each strawberry. Dip each strawberry into the melted chocolate, turning it to ensure it is well-coated.
Add Toppings
If desired, roll the chocolate-covered strawberries in your choice of toppings. Place them upright in a glass or on parchment paper to set.
Let Them Set
Allow the chocolate to cool and set completely, which will take about 15 minutes at room temperature. For quicker setting, refrigerate them for about 10 minutes.
Pro Tips
- For the best results, use high-quality chocolate for melting. You can also experiment with different types of chocolate, such as white or milk chocolate, for a variety of flavors.
Troubleshooting Common Issues
If you notice that the chocolate is not adhering well to the strawberries, it's often due to moisture. Ensuring the strawberries are thoroughly dried after washing is vital. Even small droplets of water can cause the chocolate to slide off or not coat properly. If you encounter this issue, a quick tip is to remove moisture with a dab of paper towel or letting the strawberries air dry for an additional 5-10 minutes before dipping.
Alternatively, if your chocolate has seized or become grainy during melting, a quick fix involves adding a teaspoon of vegetable oil or shortening while reheating the chocolate. This can help restore its smooth texture and make it pourable again. Just be cautious with the amounts added; too much can alter the chocolate finish.
Scaling the Recipe
If you wish to scale up this recipe for larger gatherings, it’s important to maintain the chocolate-to-strawberry ratio for even coating. For every 5 strawberries added, consider increasing the chocolate amount by 100g to ensure you have enough for a good dip. Make sure to use a wide bowl for melting the chocolate, allowing easier access for dipping and ensuring a smooth and comprehensive coating.
Conversely, if you want to make a smaller batch, cutting the amount of chocolate by half works well without compromising the coating quality. It’s also beneficial to make only as many as you plan to consume soon since chocolate-covered strawberries are best enjoyed fresh within a couple of days.
Flavor Variations
For those who love experimenting with flavors, consider infusing your chocolate with extracts. A drop of vanilla or almond extract mixed into the melted chocolate creates a unique flavor profile. Additionally, a hint of orange or peppermint extract can transform these strawberry wands into a seasonal treat for the holidays, offering a refreshing twist on the traditional.
You can also mix and match chocolate types; for a visually striking effect, swirl together white chocolate and dark chocolate when coating the strawberries. It not only enhances the flavor but also creates an eye-catching design that is perfect for special occasions. Be creative in your approach, and you’ll discover many delightful combinations!
Questions About Recipes
→ Can I use frozen strawberries?
It's best to use fresh strawberries, but if you only have frozen ones, make sure they are thoroughly thawed and drained because excess moisture can impact the chocolate coating.
→ How do I store the chocolate-covered wands?
Store any leftovers in an airtight container in the refrigerator for up to 3 days for the best taste and texture.
→ Can I use other fruits?
Absolutely! Other fruits like bananas, pineapple chunks, or apple slices work wonderfully as well. Just be sure to adjust the dipping time accordingly.
→ What can I do if the chocolate starts to harden?
If your chocolate cools too much and begins to harden, gently reheat it in the microwave for a few seconds to restore its dipping consistency.
Chocolate-Covered Strawberry Wands
Created by: The Foodspherehub Team
Recipe Type: Simple Sweet Recipes
Skill Level: Easy
Final Quantity: 10 wands
What You'll Need
Ingredients
- 10 fresh strawberries
- 200g semi-sweet chocolate or dark chocolate
- Optional toppings: crushed nuts, sprinkles, or shredded coconut
How-To Steps
Rinse the strawberries gently under cold water and pat them dry with a paper towel. Ensure they are completely dry, as moisture can cause the chocolate to seize.
In a microwave-safe bowl, add the chopped chocolate. Melt it in 30-second intervals, stirring in between until smooth. Be careful not to overheat the chocolate.
Insert a skewer or lollipop stick into the stem end of each strawberry. Dip each strawberry into the melted chocolate, turning it to ensure it is well-coated.
If desired, roll the chocolate-covered strawberries in your choice of toppings. Place them upright in a glass or on parchment paper to set.
Allow the chocolate to cool and set completely, which will take about 15 minutes at room temperature. For quicker setting, refrigerate them for about 10 minutes.
Extra Tips
- For the best results, use high-quality chocolate for melting. You can also experiment with different types of chocolate, such as white or milk chocolate, for a variety of flavors.
Nutritional Breakdown (Per Serving)
- Calories: 150 kcal
- Total Fat: 8g
- Saturated Fat: 4.5g
- Cholesterol: 0mg
- Sodium: 5mg
- Total Carbohydrates: 18g
- Dietary Fiber: 2g
- Sugars: 14g
- Protein: 1g